Real Time Human Detection and ReID with Yolo11 + OSNet
Last week we reviewed how we managed to perform real-time YOLO inference directly on a mobile device, no backend server or third-party Flutter plugin required. If you missed it, check out our previous post 🚀 Real-Time Video Processing with Flutter, Native C++, and TensorFlow Lite 🚀 where we achieved 25+ FPS straight from the camera feed.
Today, we’re adding a new layer of complexity, person re‑identification (ReID). ReID assigns each detection a persistent ID across frames, so you can track the same individual even in crowded scenes. On resource‑constrained edge devices, generating high‑quality descriptors for multiple subjects is challenging, but our optimized pipeline handles this at a modest 20 FPS with impressive accuracy.
Our key focus is the descriptor, a compact feature embedding that captures distinctive visual traits for each person. We use OSNet to extract these features from cropped detections, then match them using a simple yet effective cosine similarity scoring algorithm. Below is an overview diagram illustrating how detection, cropping, descriptor extraction, and matching fit together.

Quick Review: YOLO + NMS integration
Before diving into our new ReID additions, here’s a concise refresher on integrating YOLOv11 into a mobile pipeline. If you’re familiar with these steps or have already read our previous post, feel free to skip ahead.
There are three core stages:
- Pre-processing
- Inference
- Post-processing (NMS)
Pre-Processing
Pre-processing prepares raw camera frames into the exact tensor shape and format that our YOLO 11 model expects (float32[1,384,384,3]). We used native code and the libyuv libraries to simplify these transformations and keep them optimal. The key steps include:
- Scaling: Downscale the full-resolution frame to 384 × 384 pixels. This reduces computational load early and avoids wasted effort on pixels that won’t contribute to detection.
libyuv::I420Scale(
    srcY, yRowStride,
    srcU, uRowStride,
    srcV, vRowStride,
    srcWidth, srcHeight,
    yScaled.data(), targetW,
    uScaled.data(), targetW/2,
    vScaled.data(), targetW/2,
    targetW, targetH,
    libyuv::kFilterBilinear
);- Rotation: Correct for sensor orientation. Many Android devices deliver frames rotated 90°; handle any 0°, 90°, 180°, or 270° rotations natively.
libyuv::RotationMode mode;
switch (rot) {
    case 90:  mode = libyuv::kRotate90;  break;
    case 180: mode = libyuv::kRotate180; break;
    case 270: mode = libyuv::kRotate270; break;
    default:  mode = libyuv::kRotate0;   break;
}

libyuv::I420Rotate(
    yScaled.data(), scaledW,
    uScaled.data(), scaledChW,
    vScaled.data(), scaledChW,
    yRot.data(), finalW,
    uRot.data(), finalChW,
    vRot.data(), finalChW,
    scaledW, scaledH,
    mode
);- YUV→RGB Conversion: Android camera APIs typically provide YUV_420 frames for efficiency. Convert these into an RGB float32 buffer.
libyuv::I420ToRGB24(
    yPtr, finalW,
    uPtr, finalChW,
    vPtr, finalChW,
    rgbBuffer.data(), finalW * 3,
    finalW, finalH
);
At the end we should have a nicely formatted 384 × 384 RGB representation of the image we can feed into our model.
Inference
This is the simplest of the steps since we load our image into a shared byte buffer we only need to make sure to load our model within the GPU Delegates and provide the loaded input byte buffer and the output buffer where we will be expecting our detection results:
private val input = ByteBuffer
    .allocateDirect(MODEL_WIDTH * MODEL_HEIGHT * 3 * 4)
    .order(ByteOrder.nativeOrder())
private val output = Array(1) { Array(84) { FloatArray(3024) } }

// This is our custom interface that abstacts the loading of the models
val interpreter = interpreterManager
    .initializeInterpreterFor("yolo11n_float32.tflite")

private fun processFrame(rawFrame, ByteBuffer, ...): List<FloatArray> {
  // Pre-Processing

  interpreter!!.run(input, output)

  // Post-Processing
  // ReID Logic
  return identifiedDetections
}
Post-Processing
Consists on applying NMS to extract the detections from the YOLO 11 output now of shape [1, 84, 3024] . This is done again in C++ to make sure we are getting the most out of our hardware:
// Perform class-wise NMS on predictions in the format: [channels=numChannels][columns=numColumns]
static std::vector<Detection> performNms(const float* data,
                                         int numChannels,
                                         int numColumns,
                                         float iouThreshold,
                                         float scoreThreshold) {
    int numBoxes = numColumns;
    int numClasses = numChannels - 4; // assume first 4 channels are box coords
    std::vector<Detection> allDets;

    // 1) Gather all boxes above scoreThreshold
    for (int idx = 0; idx < numBoxes; ++idx) {
        // Decode box (center x, center y, w, h)
        float cx = data[0 * numBoxes + idx];
        float cy = data[1 * numBoxes + idx];
        float w  = data[2 * numBoxes + idx];
        float h  = data[3 * numBoxes + idx];
        float x1 = cx - w * 0.5f;
        float y1 = cy - h * 0.5f;
        float x2 = cx + w * 0.5f;
        float y2 = cy + h * 0.5f;

        // Find best class score
        int bestClass = -1;
        float bestScore = scoreThreshold;
        for (int c = 0; c < numClasses; ++c) {
            float score = data[(4 + c) * numBoxes + idx];
            if (score > bestScore) {
                bestScore = score;
                bestClass = c;
            }
        }
        if (bestClass >= 0) {
            allDets.push_back({x1, y1, x2, y2, bestScore, bestClass});
        }
    }

    std::vector<Detection> output;
    // 2) Perform NMS per class
    for (int cls = 0; cls < numClasses; ++cls) {
        // Collect detections of this class
        std::vector<Detection> clsDets;
        for (auto &d : allDets) {
            if (d.classId == cls) clsDets.push_back(d);
        }
        // Sort by descending score
        std::sort(clsDets.begin(), clsDets.end(), [](const Detection &a, const Detection &b) {
            return a.score > b.score;
        });

        std::vector<bool> suppressed(clsDets.size(), false);
        for (size_t i = 0; i < clsDets.size(); ++i) {
            if (suppressed[i]) continue;
            output.push_back(clsDets[i]);
            // Suppress overlapping boxes
            for (size_t j = i + 1; j < clsDets.size(); ++j) {
                if (suppressed[j]) continue;
                float xx1 = std::max(clsDets[i].x1, clsDets[j].x1);
                float yy1 = std::max(clsDets[i].y1, clsDets[j].y1);
                float xx2 = std::min(clsDets[i].x2, clsDets[j].x2);
                float yy2 = std::min(clsDets[i].y2, clsDets[j].y2);
                float w = std::max(0.0f, xx2 - xx1);
                float h = std::max(0.0f, yy2 - yy1);
                float inter = w * h;
                float areaA = (clsDets[i].x2 - clsDets[i].x1) * (clsDets[i].y2 - clsDets[i].y1);
                float areaB = (clsDets[j].x2 - clsDets[j].x1) * (clsDets[j].y2 - clsDets[j].y1);
                float ovr = inter / (areaA + areaB - inter);
                if (ovr > iouThreshold) suppressed[j] = true;
            }
        }
    }
    return output;
}
With all this in mind at the end of this process we should have our transformed 384 × 384 RGB input image and our detection bounding boxes which we will use for ReID in the next sections.
Crops and OSNet Integration
This section covers the OSNet integration, which requires some preprocessing specifically, generating the image crops. Our OSNet model expects inputs of size 256 × 128 pixels, and we’ll be using the x0.5 variant, which provides an optimal balance between accuracy and speed. You can find this variant in the torch reid model zoo.
Let's divide our tasks:
- Crops: By reusing the image buffer generated in the previous section, we can significantly reduce computational overhead. We’ll allocate a fixed set of crop buffers once and then reuse them for each crop operation. In our use case, we only ever need to handle up to eight crops at a time.
- OSNet integration: We can also leverage our existing interpreter-loading strategy to run inference on each crop buffer sequentially. Since true batching isn’t supported in this mobile pipeline with our chosen models, feeding buffers one by one keeps the implementation simple and efficient.
Crops
Let’s dive into how our pipeline turns a full-frame buffer into the perfectly sized crops that feed OSNet without drowning the app in allocations or slow Java loops.
- We rewind the source frame so the native code can read from the start.
- We hand off to a JNI bridge (
cropAndResizeNative) along with the normalized box coordinates, the destination buffer, and the crop dimensions. - When it returns, we rewind the destination and hand it off for descriptor extraction.
- Native Pipeline for Speed
Why C++? On Android we get the camera in a float buffer, but converting, resizing, and re‐packing pixel data in Kotlin is slow. Instead, ourcropAndResizeNativedoes five steps entirely in native code: Thread-local vectors for each temporary stage mean we pay allocation cost at cold start only and after that, every crop is blazing fast.- Normalize→Pixel: Convert the box from
[0..1]floats into integer pixel coordinates. - Float→RGB24: Clamp each float channel to [0,1], multiply by 255, and write into a temporary
uint8_t[]. - RGB24→ARGB32: Use libyuv’s
RGB24ToARGBfor fast planar conversion. - Scale: Call
ARGBScalewith bilinear filtering to reach exactly 128 × 256. - ARGB→Planar Float: Finally, unpack back into three float planes, each normalized to [0,1], ready for the TFLite interpreter.
- Normalize→Pixel: Convert the box from
- Why This Matters
By reusing our buffers and offloading heavy pixel work to libyuv in C++, we keep our main loop lean. We avoid constantly churning objects and reduce JNI overhead to a single call per crop. This keeps our ReID stage ready to pump descriptors into OSNet as fast as the camera can feed frames.
Picking a Buffer and Cropping
Every time we want to crop out one detection, we call generateCrop(frame, box, bufferIdx, frameW, frameH). Internally:
private fun generateCrop(
  frame: ByteBuffer,
  box: FloatArray,
  bufferIdx: Int,
  frameW: Int,
  frameH: Int
): ByteBuffer {
  val dst = bufferPool[bufferIdx]
  frame.rewind()
  cropAndResizeNative(
    frame, frameW, frameH,
    dst,
    box[0], box[1], box[2], box[3],
    cropWidth, cropHeight
  )
  dst.rewind()
  return dst
}
A Pool of Reusable Buffers
Right at construction, we carve out eight direct ByteBuffer each big enough for a 128 × 256 × 3‐channel float image and keep them around in an array called bufferPool. Because mobile GC is unforgiving, we never reallocate these buffers at runtime. Instead, we simply pick one by index, clear it, and write into it again and again.
private val bufferPool = Array(8) {
  ByteBuffer.allocateDirect(4 * cropWidth * cropHeight * 3).apply {
    order(ByteOrder.nativeOrder())
  }
}
And that’s how, in just a few hundred lines of Kotlin and C++, we carve out exactly the pixels OSNet needs efficiently, predictably, and without hiccups.
OSNet Integration
Now that we have our perfectly cropped buffers in hand, let’s see how OSNet brings each crop’s descriptor to life and how we turn those descriptors into persistent “tracklets” of identities.
- Accumulate the cosine similarity between the new descriptor and every saved descriptor for that identity.
- Average those scores.
- Compare to our
similarityThreshold(0.6 by default). - Sort detections by confidence and pick our top three.
- Loop over those boxes, reusing buffer
i % bufferPool.size. - Crop, extract, and match in sequence.
- Emit a new list of
[x1, y1, x2, y2, confidence, id]arrays. - Why This Works
- Sequential interpreter calls avoid the complexity of batching on mobile.
- Buffer reuse guarantees steady memory usage and avoids GC spikes.
- History-based matching smooths out occasional descriptor noise so a person briefly occluded or under weird lighting still retains their identity.
Putting It All Together
In assignIdentities(), we:
fun assignIdentities(
  frame: ByteBuffer,
  detections: List<FloatArray>,
  frameW: Int, frameH: Int
): List<FloatArray> {
  val enriched = mutableListOf<FloatArray>()
  val top = detections.sortedByDescending { it[4] }.take(3)
  for ((i, box) in top.withIndex()) {
    val crop      = generateCrop(frame, box, i % bufferPool.size, frameW, frameH)
    val descriptor= extractDescriptor(crop)
    val id        = matchOrCreateId(descriptor)
    enriched.add(box + floatArrayOf(id.toFloat()))
  }
  return enriched
}
Matching or Creating Identities
We keep an identityPool of Identity(id, descriptors) objects, each holding a small history of past descriptors. To decide if our new crop belongs to identity #3 or #7 or if it’s someone brand new. If the average similarity passes the bar, we tag this crop with that identity and append the descriptor to its history (culling the oldest when we exceed maxHistory). Otherwise, we spin up a brand-new identity:
private fun matchOrCreateId(descriptor: FloatArray): Int {
  for (identity in identityPool) {
    var sumSim = 0.0
    for (oldDesc in identity.descriptors) {
      sumSim += cosineSimilarity(oldDesc, descriptor)
    }
    val avgSim = (sumSim / identity.descriptors.size).toFloat()
    if (avgSim >= similarityThreshold) {
      identity.descriptors.addLast(descriptor)
      if (identity.descriptors.size > maxHistory)
        identity.descriptors.removeFirst()
      return identity.id
    }
  }
  // No match → new identity
  val newId = nextId++
  identityPool.add(Identity(newId, ArrayDeque(listOf(descriptor))))
  return newId
}
Computing Similarity on the Fly
Once we have a 512-dim descriptor, we compare it against every “active” identity in our pool. We use a direct cosine similarity (no temporary allocations!) so that each comparison is just a tight loop of multiplies and adds:
private fun cosineSimilarity(a: FloatArray, b: FloatArray): Float {
  var dot = 0f; var magA = 0f; var magB = 0f
  for (i in a.indices) {
    dot  += a[i] * b[i]
    magA += a[i]*a[i]
    magB += b[i]*b[i]
  }
  return dot / (sqrt(magA) * sqrt(magB) + 1e-6f)
}
Feeding the Interpreter
Our ReIdProcessor takes a crop: ByteBuffer and passes it straight into the TensorFlow Lite interpreter:
private fun extractDescriptor(crop: ByteBuffer): FloatArray {
  val reidOutput = Array(1) { FloatArray(descriptorDim) }
  crop.rewind()
  reidInterpreter.run(crop, reidOutput)
  return reidOutput[0]
}
Because we preloaded reidInterpreter at startup, each run() call is a lightning-fast JNI hop no repeated model loading, just raw inference.
In just a handful of methods, we’ve built a robust, real-time OSNet pipeline on Android that crops, infers, and tracks people, all while staying lean and predictable.
Conclusion
Wrapping up, our mobile ReID pipeline delivers:
- High Efficiency: By pooling direct
ByteBuffers and offloading pixel work to native C++ with libyuv, we steer clear of GC pauses and Kotlin‐level loops keeping our frame rate around 20 FPS on typical devices. - Simplicity in Deployment: We load both YOLO and OSNet TFLite models once at startup (using our
InterpreterApiwrapper) and then invokerun()per crop, no heavyweight batching or third‐party plugins needed. - Robust Identity Tracking: A lightweight, history‐based matching algorithm (cosine similarity over the last N descriptors) turns momentary detections into stable tracklets, even under occlusion or lighting changes.
- Balanced Accuracy vs. Speed: Choosing OSNet x0.5 gives us compact 512-dim embeddings with performance that plays well on mobile NPUs.
Along the way, we leaned on:
- TensorFlow Lite for on-device inference without a backend server.
- libyuv for blazing‐fast image transforms in native code.
- Kotlin coroutines to preload interpreters off the UI thread.
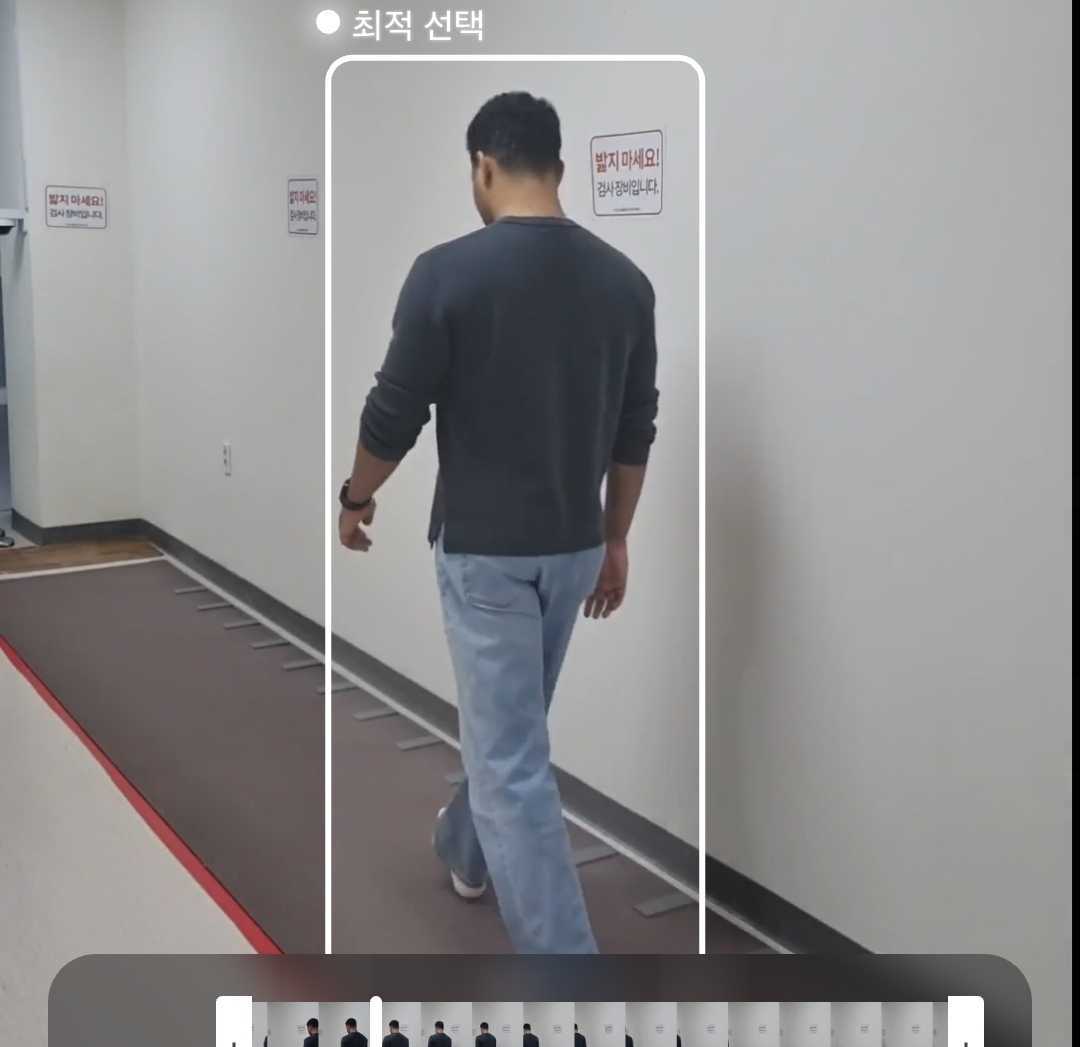
All of these come together in our Gait Analysis App, where users can not only detect people but select exactly whose gait parameters they want to extract live, on their phone, no cloud required.
If you haven’t yet, be sure to catch our previous deep dive on real-time YOLO in Flutter:
🚀 Real-Time Video Processing with Flutter, Native C++, and TensorFlow Lite 🚀
🎬 Demo Video
Below is a quick demonstration of the final product in action, watch how we compile detection, ReID, and gait-parameter extraction into a seamless mobile experience. Enjoy!
Stay tuned: next week we’ll dive into a native Android camera implementation in Kotlin, bypassing Flutter’s built-in packages for finer control and truly seamless recording without that annoying stutter when switching into record mode. 🙌